September 28, 2020 0 Comments
Hello crafty friends!
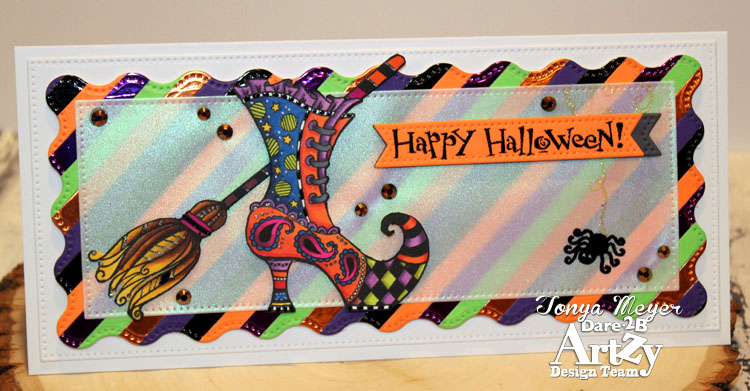
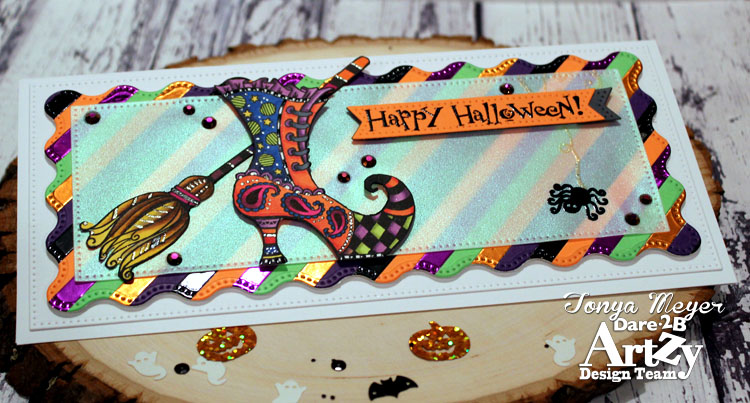
Happy Monday! It’s Tonya from Krafty Enchantments. I’m back with a fun card today featuring the awesome Witches Shoes stamp set from Dare 2B Artzy! This set is one of my all-time favorite stamp sets from Dare 2B Artzy because it’s a Halloween set and it has boots in it! I mean who doesn’t love Halloween and a good pair of witchy boots?
I started by cutting lots and lots of strips of scrap cardstock to make my card panel. I have a drawer in my paper chest where I keep larger pieces of leftover cardstock and I thought that this would be an awesome way to put them to use. I cut the strips into ¼ inch widths. Of course cutting the strips took time, but mostly because I cut so many more than I needed. I only used 30 strips for the panel. I wasn’t too concerned with the length of each strip as long as it was at least about 4 ½ inches in length so that it would cover the panel width.
Once I had a decent amount of strips I arranged them in a color order that I liked to make up my background making sure that I had a plain cardstock between each piece of foil cardstock.
Next, I cut a piece of cardstock that was about 4 x 8 inches in size. I actually used too heavy of a weight for this project with my 110lb cardstock. In reality I should have used a heavy weight printer paper. I’ll explain why later.
I covered the 4 x 8 cardstock with some double sided adhesive tape. The tape I have is about 5 inches wide so it worked perfectly to cover the entire width of the panel. You could also use a piece of Stick-it Adhesive paper as well if you didn’t have double sided adhesive tape in a wide width. I cut off any excess adhesive that was hanging over the edges of the 4×8 panel.
To make sure my adhesive tape was firmly adhered, I burnished it with my bone folder. When finished I removed the backer of the adhesive to reveal a fully sticky backed panel.
I began laying down alternating colors of cardstock strips diagonally across my cardstock until the entire panel was full. I used the pointed end of a Tool-in-One to poke each strip and butt it up against the preceding strip before I secured it into place. This helps eliminate gaps of white showing between the strips. Once all the strips were in place I trimmed off all of the overhanging strips of cardstock so I had just a 4×8 panel covered in cardstock strips.
Finally I was ready to die cut the 4×8 panel using the largest wavy rectangle from the Wavy Slimline Framelets die. Initially I ran the panel and die through my manual die cut machine, however it would not cut all the way through the layers of cardstock and adhesive. This is when I realized I should have used printer paper or a lighter cardstock. I wasn’t about to start the process over so I pulled out my electronic die cutter. I ran the die and cardstock through with just the magnetic platform and the plates and it still wouldn’t cut all the way through. Ultimately I had to add my metal shim and an additional piece of cardstock to the sandwich and it finally cut the majority of the panel. I did trim it in a few areas that didn’t cut all the way through. Thankfully it turned out OK and I didn’t have to start over. NOTE: Use thin paper when creating a background made of cardstock strips and double sided adhesive, you’ll thank me later, LOL!
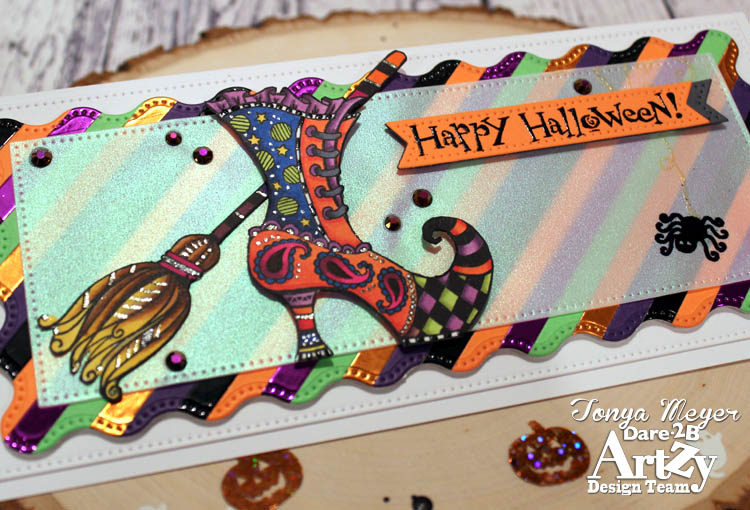
I stamped the witchy boot and broomstick images on some 110lb cardstock with Dare 2B Artzy’s Totally Black ink. I colored the boots with my Spectrum Noir Tri-blend alcohol markers using lots of bright Halloween colors. I’m not as accustomed to the Spectrum Noir markers so it was fun to try my hand at a different set of markers. Once finished I fussy cut the boot and set it aside. I then colored the broomstick using my Chroma Flagship alcohol markers in shades of brown and yellow-ish and then colored the broomstick with some bright colors as well. Once I’d finished coloring, I fussy cut it as well. There is a coordinating die set available for this, I just don’t happen to have it. To finish off my images, I used a black alcohol marker to go around the boot and broomstick to cover up the white edge of the paper from the fussy cutting.
To add some little sparkly details to the boot and broomstick, I used a Sakura Jelly Roll Sparkle pen to add some fine dot details to the boot where the stamped image had dots and also to the broomstick handle and bristles. I also used a Sakura Glaze pen in black to add a few darker black details to the boot and broom.
Next, I wanted to tone down my colorful wavy panel so I found a piece of shimmery iridescent vellum in my stash and cut the smallest rectangle from the Wavy Slimline Framelets die set. The vellum has an iridescent green glow which really goes well with the green in my background panel.
I stamped a portion of the spider’s web from the Dare 2B Artzy Witchy Boots stamp set onto the upper right corner of the vellum and heat embossed it with some Hero Arts Enchanted Gold embossing powder. Finally, I stamped the little spider from the set at the end of the web and heat set with some black fine detail embossing powder from Hero Arts.
To create the sentiment, I stamped the Happy Halloween onto some orange cardstock with embossing ink and heat embossed with the Black fine detail embossing powder again. I used the small flag die from the Wavy Framelets set and cut the sentiment out. Then I moved the die down and created a shorter sentiment flag by running it through my die cut machine again. I love that you can do that so easily with the Dare 2B Artzy dies because the pierced detail on the dies makes it super easy to line everything back up and run it through again to shorten or lengthen the flag dies. I cut a second flag from some grey cardstock and layered it behind my sentiment.
I arranged the broom and added some double sided adhesive to adhere it to the vellum. The witchy boot and my sentiment strip were added with some dimensional foam. Having these items on the vellum allowed me to hide the adhesive I put on the back of the vellum to secure it to my wavy rectangle base. I used little pieces of double sided adhesive wherever my broom, boot, sentiment and spider were and then attached it to the front of my brightly colored panel.
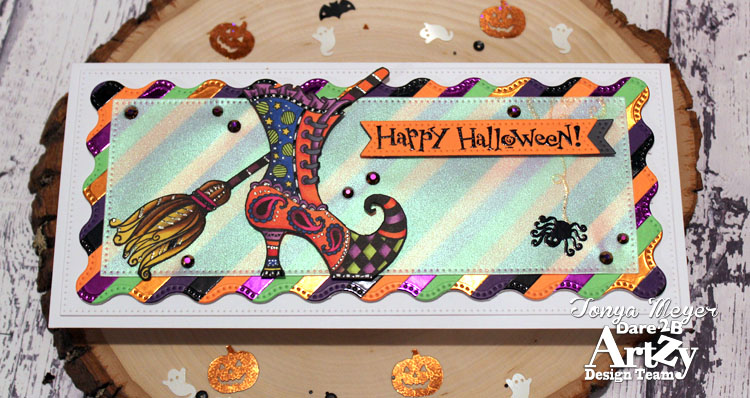
I added everything to a piece of white cardstock cut from the largest pierced rectangle from the Wavy Slimline Framelets die set.
The entire panel was added to a white card base from some 110lb cardstock.
I added a few dark colored gems to give a bit of bling to the card front.
I hope you’ve enjoyed my fun little Halloween slimline card featuring the Witchy Boot Stamp set from Dare 2B Artzy.
Be sure to check back in next Sunday when Dare 2B Artzy starts a new challenge for the month of October.
The Dare 2B Artzy products used for today’s post are linked below.
Thanks for stopping by! Have an Artzy Day!
Hugs,
Tonya
May 12, 2023 0 Comments
May 05, 2023 0 Comments
March 11, 2023 0 Comments