Country

  • Log in
  • Cart (0)
  • Checkout
  • Home
  • Shop 
    • What's New
    • Collections 
      • Coastal Getaway Collection
      • Countryside Floral Collection
      • Everything is Blooming Collection
      • Feelin' Groovy Collection
      • Home Grown Collection
      • Home for the Holidays Collection
      • Holiday Magic Collection
      • Make Waves
      • Space Odyssey
      • Merry & Bright
      • North Pole Holidays
      • Snow Much Fun Collection
      • All the Buzz Collection
      • Fall Harvest Collection
      • Ice Cream Social
      • Seas the Day Collection
      • Totally Tracy Collection
    • Stamps 
      • Everyday Celebrations
      • Holidays
      • Totally Tracy
      • Florals
      • Seasonal
      • Animal Lovers
      • Backgrounds
      • Alphabets
      • Faith Based
      • Sports & School Activities
      • Stamps with Dies
      • Thank you
      • Thinking of You/Encouragement
    • Crafty Supplies
    • Artzy Dies 
      • Dies with Stamps
      • Word Dies
      • Framelits
      • Background Dies
      • Specialty Dies
      • Stand Alone Dies
      • Slimline Dies
    • Artzy Papers
    • Artzy Inks
    • Stencils & Mixed Media
    • Hot Foil Plates
    • OLO Markers
    • Card Kits and Bundles
    • Gift Card
    • Sale
    • Digital Stamps
  • About 
    • About Us
    • Contact Us
    • Design Team
  • Wholesale
  • Blog
  • Events 
    • Classes & Kits
    • Trade Shows
    • Virtual Trade Shows
    • Artzy Crafting Studio
  • Stamp & Die Club
  • Country

dare2bartzy.com/blog

Embrace your inner Elf

November 08, 2021 0 Comments

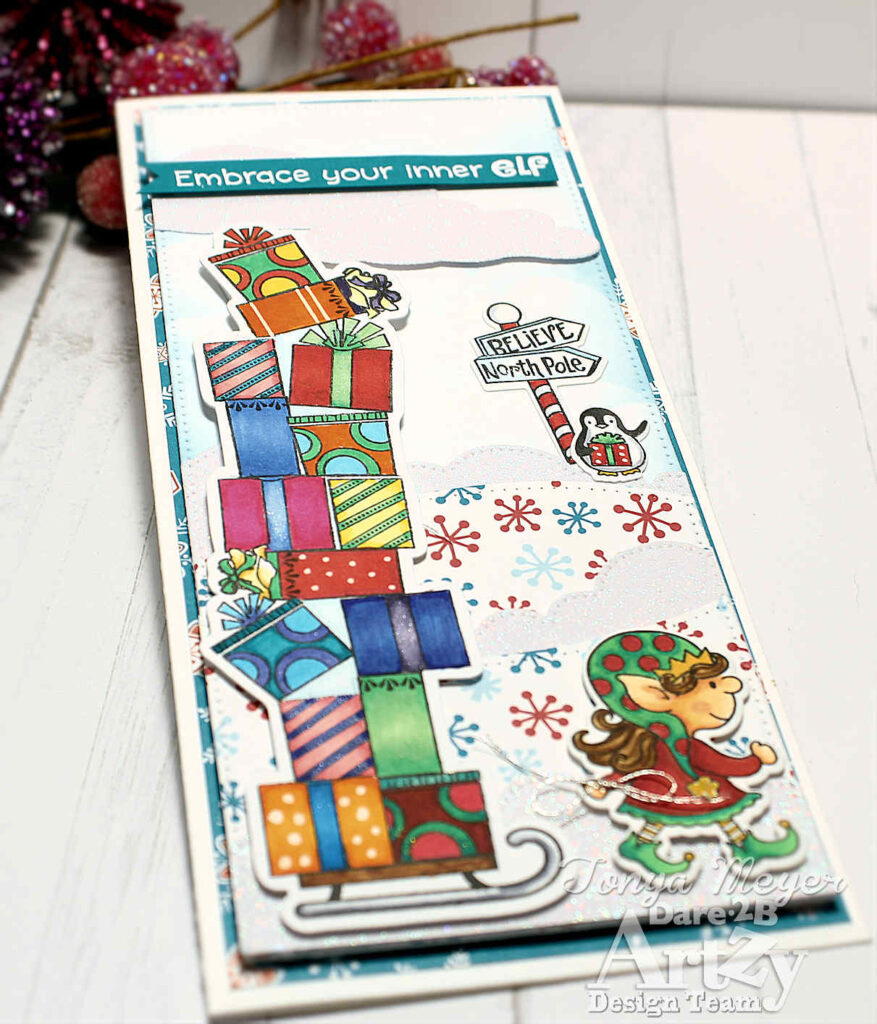
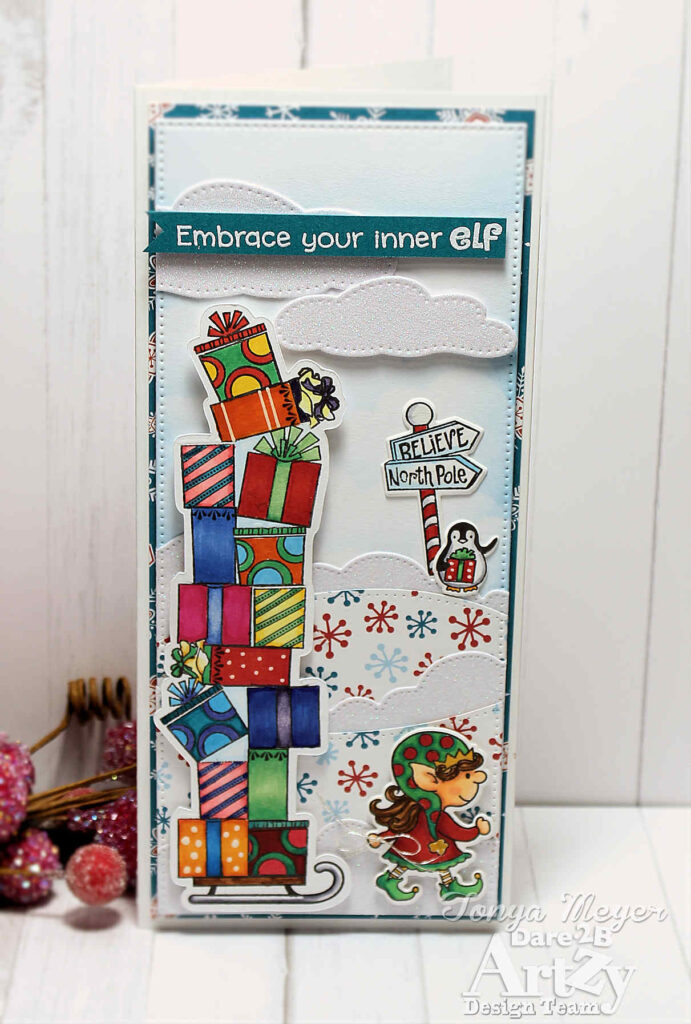
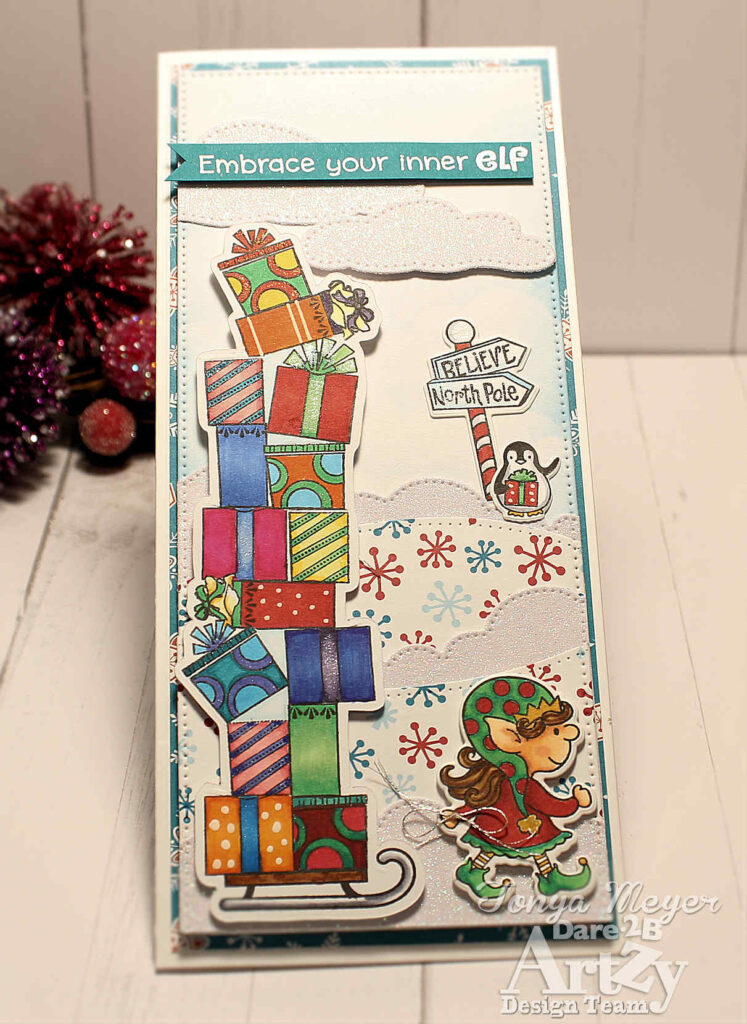
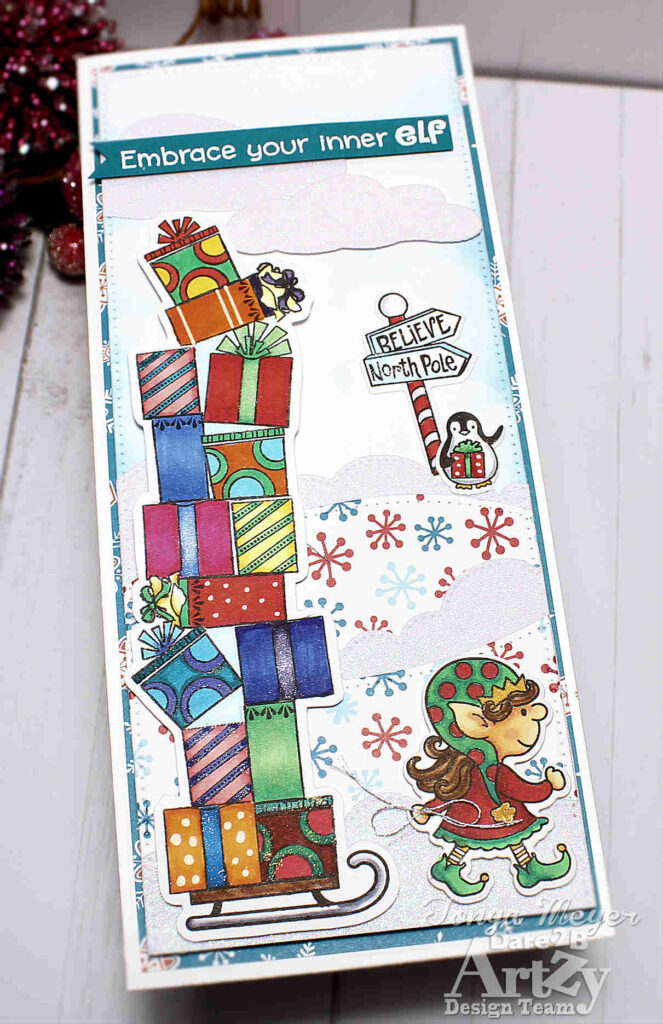
Hello Artzy friends! It’s Tonya from the Dare 2B Artzy design team. I hope you’re having a wonderful day. I am popping in with a fun slimline card featuring the Naughty or Nice stamp set with the adorable elves. When I saw this set, I knew exactly what I wanted to do to make a fun card. The elves have definitely been busy prepping early for Santa’s big night particularly this year since Santa will be delivering lots more packages due to the projected shipping delays.

To start my card, I cut a piece of 110lb cardstock to 5 ½ x 8 ½ and took out my Naughty or Nice stamp set as well as the Penguin Plunge stamp set. I pulled out all of the gift package stamps from each set and put them aside.

I placed my cardstock into my MISTI and grabbed a pad of sticky notes. To start I stamped the little sled from the Naughty or Nice stamp set and stamped it with Totally Black Ink. I wiped away any ink on the bows at the top of the packages before stamping.  Next, I stamped two packages on the top of the sled. Using a Post-it Note, I masked both of the stamped packages. My Post-it note would go right up to the center of the stamped line on the top of the packages. Next, I lined up a couple more stamps that were different from what I originally stamped and inked them up with Dare 2B Artzy ink again wiping away any bows that would get in the way.

For the next layer of packages, I turned one a little topsy-turvy and masked everything that could potentially be in the way of my stamping. In some cases I had to use 2 or 3 of my Post-it Notes to mask the packages from different angles (top and side). Truthfully, this was the easiest masked stamping I’ve done. It’s a lot easier because all of the packages are square or rectangle and there isn’t any complicated front to back masking layers. I continued on masking and stamping the packages until I had quite a few on the sled. I didn’t want to make it too tall or I wouldn’t have room to place a sentiment. I did pre-stamp all of the packages before-hand as well as a test to see what would work and how tall I needed to make the packages on the sled. I always create a stamp map whenever I’m going to be creating any masking for my card scenes.

When doing this kind of stamping and masking you occasionally have stamped areas that are cutoff or have extra lines but these are usually easy to fix or cover. Once my stamping was complete, I went back with a pencil and drew in some finished corners on a couple of the packages and the bow on one of the tall skinny packages. Once I’d finished with the pencil lines, I went back in with a Micron pen (Copic safe) and traced over my pencil lines.

Next, I colored all of the packages and the sled with my Copic markers.  On a couple of the packages, I had some extra stamped lines but I was able to cover those up with my markers.

When I had finished my coloring I went back with a couple of my Tonic Aqua Shimmer pen and added some gold and silver sparkle over some areas of the packages. I also used a white Jelly Roll to add some additional details

On some scrap cardstock, I stamped the cute little girl elf and the North Pole sign as well as the smallest penguin from the Penguin Plunge set (he’s super tiny and oh so cute) and colored them with my Copics as well. Once I’d finished my coloring I cut out my images with the coordinating dies.

For my sled stacked high with packages, I decided to cut it using my Brother Scan-n-Cut Machine. The machine makes it easy to cut out stamped images and for this sled it worked perfectly which I was relieved about. I was also glad I didn’t have to fussy cut it out.

When all of my images were cut out I set them aside to work on my background. First I cut a piece of 110lb cardstock with the large rectangle die from the Wavy Slimline Framelets die set.

I also cut the cloud border die from a scrap of paper and used that to ink blend on some very soft blue background clouds on my cardstock.

For the snow covered ground, I used the same cloud border die to cut some white glitter paper in different heights to give the appearance of fluffy snow banks. I layered some of the Snowflake Paper from the Chocolate Moose paper pack and cut some slopes and curves’ using the Curves Slimline Border dies. The layers created some snowy hillsides for my background. I added each layer with some liquid glue and placed them onto my ink blended background.

I added the North Pole sign on the top of the snowy hill along with the little penguin with his little gift.

For the sled and gift packages, I added some dimensional foam on the back and added it to the background. Under the front side of the sled, I added a piece of sliver embroidery thread and ran it underneath the dimensional foam I put on the cute little elf girl to make it look like she was pulling the sled with the precariously stacked packages.  I also cut some additional embroidery thread and tied a tiny bow and stuck it too her hand with a tiny amount of liquid glue. This helps the appearance of rope pulling. I love that she looks so very determined, it’s just too cute!

To finish off my sky, I die cut two of the clouds from the Curve Slimline Border Dies from the same glitter cardstock I used for the snow. I added liquid glue to the larger cloud and added it directly to my background and popped up the smaller cloud with dimensional foam. I trimmed off the excess from the larger cloud that was hanging off the background.

For the sentiment, I stamped the Embrace your Inner Elf onto some teal cardstock and heat set with some detail white embossing powder.

I added the whole panel to some Frosty Chalet cardstock to mat it with a bit of darker cardstock and then added it to a slimline card base with some liquid glue.

I really enjoyed the stamping and masking project for the sled and packages. I think it made for a really cute card. Glad I was able to make my idea work for this fun card.

Thanks so much for stopping by. I plan to have a YouTube video up for this card later this week and I’ll link it here when I have it done.

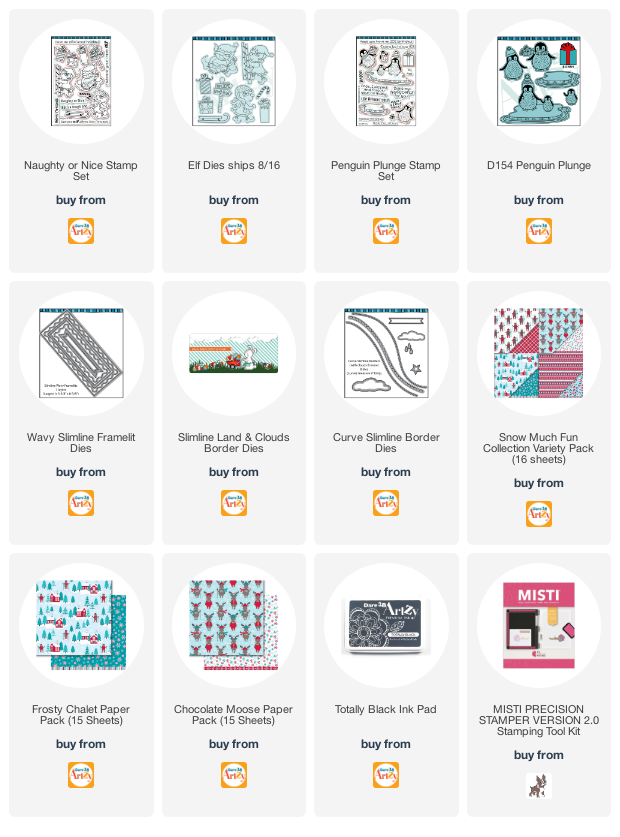
The products used in today’s card are linked below for your convenience.

Hugs,

Tonya


Tweet Share Pin It Email

Also in dare2bartzy.com/blog

2023 Spring/Summer Coffee Lovers Hop WINNER

May 12, 2023 0 Comments

Happy Friday!! Thanks to all those who hopped along with us this past week!! We have a WINNER to annouce!! Congrats….. Helene Huber E-mail us at dare2bartzy@yahoo.com to claim your $20 Gift Certificate!!  Have an ARTZY day!!

Continue Reading

2023 Spring/Summer Coffee Lovers Hop

May 05, 2023 0 Comments

Happy Friday!! Ready for another Coffee Lovers Hop? As always, we are super excited to be a Super Sponsor! You should have arrived here from Crackerbox Stamps, if not be sure to start out at the Coffee Loving Cardmakers Blog, so you don’t miss out on any of the fun!! We are offering a $20...

Continue Reading

Feb Challenge Winner/Challenges

March 11, 2023 0 Comments

Hello Artzy Friends! As a reminder, we are unfortunately stopping our challenges. We want to thank those who shared their lovely creations with us each month! We loved seeing your work!! Please be sure to be a part of our Artzy Community or Follow us on Instgram! Our Febuary Challenge Winner is… Link-Up 1 #20...

Continue Reading

Customer Service
  • Search
  • About Us
  • Angel Policy
  • Privacy Policy
  • Refund Policy
  • Publication Incentive/Affiliate Program
  • Studio Hours & Directions
Sign up for our newsletter

Sign up to get the latest on sales, new releases and more…

who we are

 Our family-owned business began out of a passion for designing little pieces of art. Our products are designed to help you unleash your creativity as you connect, commemorate, inspire and uplift. We encourage you to be "ARTZY". Thank you for being a part of our story.


  • Search
  • About Us
  • Angel Policy
  • Privacy Policy
  • Refund Policy
  • Publication Incentive/Affiliate Program
  • Studio Hours & Directions

Country

© 2025 Dare 2b Artzy. POS and Ecommerce by Shopify